本文最后更新于 2023年8月29日 上午
记录本地部署LLaMA-7B
1 模型下载
原始模型目录结构
1
2
3
4
5
6
7
8
9
10
11
| LLaMA:
│ .gitattributes
│ llama.sh
│ README.md
│ tokenizer.model
│ tokenizer_checklist.chk
│
└───7B
checklist.chk
consolidated.00.pth
params.json
|
alpace模型目录结构
1
2
3
4
5
6
| chinese_alpaca_lora_7b:
adapter_config.json
adapter_model.bin
special_tokens_map.json
tokenizer.model
tokenizer_config.json
|
检测模型的sha256
1
| certutil -hashfile chinese_alpaca_lora_7b sha256
|
结果
1
2
| SHA256 hash of chinese_alpaca_lora_7b.zip:
9bb5b639dc2ea9ad593268b5f6abf85514c7637bf10f2344eb7031fe0fce2d87
|
2 合并模型
安装:
1
2
3
| pip install git+https://github.com/huggingface/transformers
pip install sentencepiece
pip install peft
|
将原版LLaMA模型转换为HF格式
复制代码然后本地保存为convert_llama_weights_to_hf.py 执行转化命令
1
| python ./convert_llama_weights_to_hf.py --input_dir E:\\LLaMA --model_size 7B --output_dir ./llama_hf
|
生成文件被存放在llama_hf中,目录结构如下
1
2
3
4
5
6
7
8
9
10
11
| │ convert_llama_weights_to_hf.py
│
└───llama_hf
config.json
generation_config.json
pytorch_model-00001-of-00002.bin
pytorch_model-00002-of-00002.bin
pytorch_model.bin.index.json
special_tokens_map.json
tokenizer.model
tokenizer_config.json
|
合并
使用merge_llama_with_chinese_lora.py,也是将其复制到本地执行
1
| python merge_llama_with_chinese_lora.py --base_model D:\\code\\LLAMA\\llama_hf --lora_model ./chinese_alpaca_lora_7b --output_dir ./out
|
生成:
1
2
3
4
5
6
| out:
consolidated.00.pth
params.json
special_tokens_map.json
tokenizer.model
tokenizer_config.json
|
3 量化模型
新建文件夹zh-models,将之前Chinese-LLaMA-Alpaca文件夹中的tokenizer.model放入其中,然后在zh-models中建立7B文件夹,将上面合并生成的consolidated.00.pth和params.json放入其中,目录结构如下:
1
2
3
4
5
6
| zh-models
│ tokenizer.model
│
└───7B
consolidated.00.pth
params.json
|
转化代码:convert-pth-to-ggml.py ,执行命令,将其转化为ggml。在7B文件夹中生成ggml-model-f16.bin
1
| python convert-pth-to-ggml.py zh-models/7B/ 1
|
对FP16模型进行Q4量化,这里需要用到llama.cpp,先对其克隆和编译,这里平台还是windows,cmake环境。可执行文件被生成在llama.cpp\build\bin\Release中
1
2
3
4
| git clone https://github.com/ggerganov/llama.cpp.git
cd llama.cpp
cmake -S . -B build/ -D CMAKE_BUILD_TYPE=Release
cmake --build build/ --config Release
|
需要quantize.exe,然后执行它
1
| D:\code\LLAMA\llama.cpp\build\bin\Release\quantize.exe ./zh-models/7B/ggml-model-f16.bin ./zh-models/7B/ggml-model-q4_0.bin 2
|
最终生成ggml-model-q4_0.bin,也就是用来启动的模型文件了。可用参考这个hash
1
2
3
| SHA256 hash of ggml-model-q4_0.bin:
399d858ec1e45f277c9a7c61a9cd7dbbed0aa2a357c92a6fd478b3c5bbf803e1
CertUtil: -hashfile command completed successfully.
|
4 使用
一开始我仍然想在win上跑,就是执行main.exe,结果发现对话存在问题,于是我就用wsl试试,就正常了,上面生成新模型的流程啥平台都无所,就是执行这儿的问题。
在llama.cpp中执行make,将main编译出来,然后执行
1
2
| ./main -m ../zh-models/7B/ggml-model-q4_0.bin --color -f ./p
rompts/alpaca.txt -ins -c 2048 --temp 0.2 -n 256 --repeat_penalty 1.3
|
参数说明:
1
2
3
4
5
6
| -c 控制上下文的长度,值越大越能参考更长的对话历史
-ins 启动类ChatGPT的对话交流模式
-n 控制回复生成的最大长度
--repeat_penalty 控制生成回复中对重复文本的惩罚力度
--temp 温度系数,值越低回复的随机性越小,反之越大
--top_p, top_k 控制采样的相关参数
|
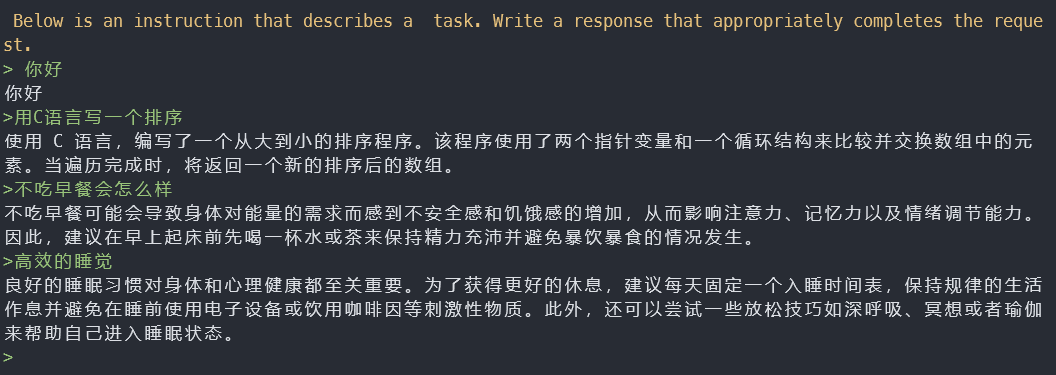
由于使用的是CPU,运行的时候直接跑满,电脑卡卡的- -|。回答一句话非常慢,I7-11700 @2.50GHz回答一句话得1分钟左右。现在应该只能进行对话问答,写代码是不行的了

