ModelScope模型库平台使用尝试

本文最后更新于:2023年12月22日 上午

阿里的模型库平台,用最少的代码实现应用,零基础也可以玩。本文以行为检测为例,展示在各个平台的使用

官网的文档中心

1 notebook云端使用

对应官网文档章节,以下对其步骤的简述。

环境

  • 注册账号
  • 在对应项目页面右上角选择notebook打开,会有个弹窗,选择去绑定,关联阿里云账号
  • 勾选授权后回到项目页面继续点击notebook打开
  • 选择白嫖的方式一启动,等待几分钟,点击查看Notebook
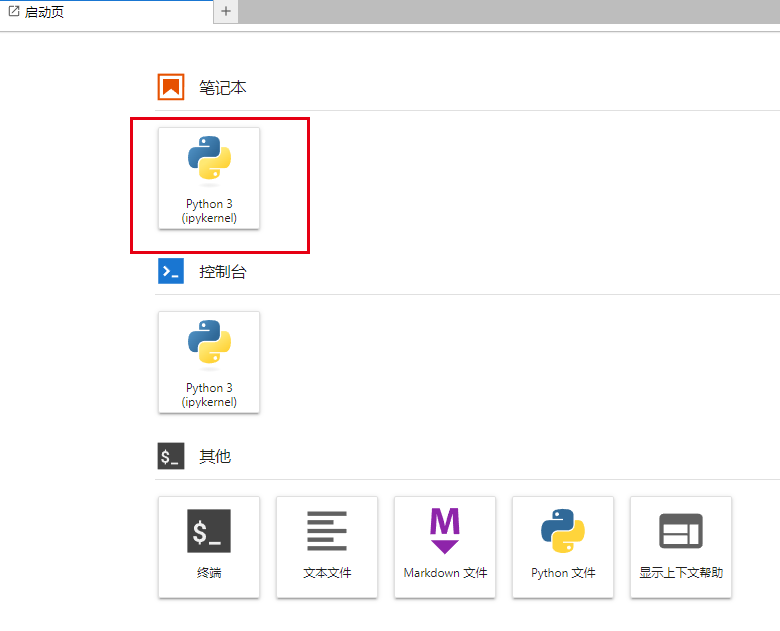
  • 新弹出的网页中,选择新建一个笔记本,这个空间它不会保存任何东西,所有啥都得新建
  • torch和python环境是有的,那么就需要装modelscope,在打开笔记本中输入,然后执行
    1
    pip install "modelscope[cv]" -f https://modelscope.oss-cn-beijing.aliyuncs.com/releases/repo.html

检测

  • 导入包
    1
    2
    from modelscope.pipelines import pipeline
    from modelscope.utils.constant import Tasks
  • 选择模型
    1
    action_detection_pipeline = pipeline(Tasks.action_detection, 'damo/cv_ResNetC3D_action-detection_detection2d')
  • 执行、打印与结果
    1
    2
    3
    result = action_detection_pipeline('https://modelscope.oss-cn-beijing.aliyuncs.com/test/videos/action_detection_test_video.mp4')
    print(f'action detection result: {result}.')
    action detection result: {'timestamps': [1, 3, 5], 'labels': ['吸烟', '吸烟', '吸烟'], 'scores': [0.7527751922607422, 0.753358006477356, 0.688035249710083], 'boxes': [[547, 2, 1225, 719], [529, 8, 1255, 719], [584, 0, 1269, 719]]}.

2 centos下使用

一开始没用conda,然后装了个3.7.10得python,后面运行时各种缺少东西。算了还是根据成功案例来,用conda装,使用python3.7.13。

环境

  • 安装anconda

    1
    2
    3
    4
    yum install wget -y 
    wget https://repo.anaconda.com/archive/Anaconda3-2022.10-Linux-x86_64.sh
    chmod +x Anaconda3-2022.10-Linux-x86_64.sh
    ./Anaconda3-2022.10-Linux-x86_64.sh

    一路回车和yes,最后会问你是不是安装vscode,填入no。
    我是使用root安装的,但是建议用其他用户来进行,安装后.bashrc会在用户目录,例如/root/.bashrc

    1
    source ~/.bashrc

    然后conda -V查看命令是否识别,也可以直接添加环境变量

    1
    export PATH=/root/anaconda3/bin:$PATH

    之后初始化,然后退出终端重新进入

    1
    conda init

    后面就和上文一样正常安装了

  • 创建环境

    1
    2
    3
    4
    5
    6
    conda create -n modelscope python=3.7
    conda activate modelscope
    pip install torch torchvision torchaudio -i https://pypi.tuna.tsinghua.edu.cn/simple
    pip install "modelscope[cv]" -f https://modelscope.oss-cn-beijing.aliyuncs.com/releases/repo.html
    # 我这里缺少了个decord
    pip install decord>=0.6.0

检测

  • 填入代码
    1
    2
    3
    4
    5
    6
    7
    8
    vim test.py
    import cv2
    from modelscope.pipelines import pipeline
    from modelscope.utils.constant import Tasks
    action_detection_pipeline = pipeline(Tasks.action_detection, 'damo/cv_ResNetC3D_action-detection_detection2d')
    url = "https://modelscope.oss-cn-beijing.aliyuncs.com/test/videos/action_detection_test_video.mp4"
    result = action_detection_pipeline(url)
    print(result)
  • 执行与结果
    1
    2
    python test.py
    {'timestamps': [1, 3, 5], 'labels': ['吸烟', '吸烟', '吸烟'], 'scores': [0.7527751922607422, 0.753358006477356, 0.688035249710083], 'boxes': [[547, 2, 1225, 719], [529, 8, 1255, 719], [584, 0, 1269, 719]]}

3 windows下使用

windows下还是有点坑。主体流程和上面的是一样,这里只说明需要进行改动的地方。

将subprocess的shell参数设置为true

在Anaconda3\envs\modelscope\Lib目录下打开subprocess.py
搜索subprocess.py,修改默认参数shell=False为shell=True
不然会在最后运行时报如下错误

1
2
3
4
5
6
7
8
9
ction_onnx.py", line 99, in forward_video
subprocess.call(cmd)
File "D:\Anaconda3\envs\modelscope\lib\subprocess.py", line 339, in call
with Popen(*popenargs, **kwargs) as p:
File "D:\Anaconda3\envs\modelscope\lib\subprocess.py", line 800, in __init__
restore_signals, start_new_session)
File "D:\Anaconda3\envs\modelscope\lib\subprocess.py", line 1207, in _execute_child
startupinfo)
FileNotFoundError: [WinError 2] 系统找不到指定的文件。

安装ffmepg

安装有两种方式
其一:
这里下载
解压后将bin文件夹添加进环境变量中,之后重启终端,输入
ffmpeg –help 能够正常识别其命令
其二:直接在conda中执行conda install ffmpeg
之所以在这里说两种方式是如果你之前已经通过方式一弄好了ffmepg,那么就不需要根据文档再在conda中安装了。

修改modelscope包

如果遇到如下错误

1
2
3
4
5
6
7
8
9
10
11
12
13
14
    output = self._process_single(input, *args, **kwargs)
File "D:\Anaconda3\envs\modelscope\lib\site-packages\modelscope\pipelines\base.py", line 218, in _process_single
out = self.forward(out, **forward_params)
File "D:\Anaconda3\envs\modelscope\lib\site-packages\modelscope\pipelines\cv\action_detection_pipeline.py", line 50, in forward
preds = self.model.forward(input['video_name'])
File "D:\Anaconda3\envs\modelscope\lib\site-packages\modelscope\models\cv\action_detection\action_detection_onnx.py", line 138, in forward
return self.forward_video(video_name, scale=1)
File "D:\Anaconda3\envs\modelscope\lib\site-packages\modelscope\models\cv\action_detection\action_detection_onnx.py", line 128, in forward_video
det = self.forward_img(imgs, h, w)
File "D:\Anaconda3\envs\modelscope\lib\site-packages\modelscope\models\cv\action_detection\action_detection_onnx.py", line 77, in forward_img
'width': np.asarray(w)
File "D:\Anaconda3\envs\modelscope\lib\site-packages\onnxruntime\capi\onnxruntime_inference_collection.py", line 200, in run
return self._sess.run(output_names, input_feed, run_options)
onnxruntime.capi.onnxruntime_pybind11_state.InvalidArgument: [ONNXRuntimeError] : 2 : INVALID_ARGUMENT : Unexpected input data type. Actual: (tensor(int32)) , expected: (tensor(int64))

错误的意思是需要int64类型,结果给了个int32,实际出错的代码在D:\Anaconda3\envs\modelscope\Lib\site-packages\modelscope\models\cv\action_detection\action_detection_onnx.py中

1
2
3
4
5
pred = self.sess.run(None, {
self.input_name: imgs,
'height': np.asarray(h),
'width': np.asarray(w)
})

就是把这两个参数当成了int32,查了查asarray函数,是可以指定输入类型,于是改为

1
2
3
4
5
pred = self.sess.run(None, {
self.input_name: imgs,
'height': np.asarray(h,dtype=numpy.int64),
'width': np.asarray(w,dtype=numpy.int64)
})

4 其他

下载模型到指定位置

使用Library下载模型

1
2
3
4
5
6
7
from modelscope.models import Model
model = Model.from_pretrained('damo/nlp_xlmr_named-entity-recognition_viet-ecommerce-title', revision='v1.0.1')
# revision为可选参数,不指定版本会取模型默认版本,默认版本,默认版本为ModelScope library发布前最后一个版本
# 如何得到发布时间
# import modelscope
# print(modelscope.version.__release_datetime__)
#model = Model.from_pretrained('damo/nlp_structbert_word-segmentation_chinese-base')

使用Library Hub下载模型

1
2
3
from modelscope.hub.snapshot_download import snapshot_download

model_dir = snapshot_download('damo/nlp_xlmr_named-entity-recognition_viet-ecommerce-title', cache_dir='path/to/local/dir', revision='v1.0.1')

使用git下载

1
2
3
4
5
6
7
8
9
10
11
12
# 公开模型下载
git lfs install
git clone https://www.modelscope.cn/<namespace>/<model-name>.git
# 例如: git clone https://www.modelscope.cn/damo/ofa_image-caption_coco_large_en.git

# 私有模型下载,前提是您有响应模型权限 方法1
git lfs install
git clone http://oauth2:your_git_token@www.modelscope.cn/<namespace>/<model-name>.git
# 方法2
git clone http://your_user_name@www.modelscope.cn/<namespace>/<model-name>.git
# Password for 'http://your_user_name@modelscope.cn':
# input git token

导出onnx

官方文档

目前支持的模型 任务
BERT/StructBERT text-classification
StructBERT zero-shot-classification
SCRFD face-detection
Tinynas-DAMOYOLO image-object-detection
Transformer-CRF token-classification/part-of-speech

ModelScope模型库平台使用尝试
https://blog.kala.love/posts/b8e60588/
作者
Lissettecarlr
发布于
2022年11月22日
许可协议