人脸识别

本文最后更新于 2022年12月6日 凌晨

对人脸识别的浅谈和基于框架的实现。虽然刚步入这个领域,但是也不知道会持续多久,所有记录下目前所知道的

1 浅谈

人脸识别实际上分为两个部分,人脸检测与人脸识别,首先在图中间找到脸,然后对脸进行特征提取,和库中的特征值进行比对,有没有接近的,通过给的阈值来判断是否认为图中人和库里的对象是一个人。库需要在识别前建立,保存了需要识别对象的特征值。

由上可以看出,人脸识别需要两个模型,一个检测人脸,一个特征提取。什么是特征呢,比如早上你在路上看到一个绿头发的人,那么下午再次遇到了一个绿头,你就会想是不是同一个人呢,我们将头发颜色作为了那个人的特征,当有足够多的特征就能区分更多的人。模型便是从人头像中获取这个特征值。

2 实现

从零开始对于我肯定不现实,首先那就是去找别人写好的架子,最先找到的是facelib,代码少,使用简单,我对其进行了应用方面的改版。之后就接触了facenet,用它完整实现了识别,但是识别速度不是很快,就去了解了一下部署,发现了PaddleInference,至此由最初选择的pytorch改为了paddle,先后尝试了face.evoLVeinsightFace

下列都是一些零碎记忆,

2.1 改版的facelib

最开始最开始,我还啥都不懂时,对着github搜索栏填入face recognition,将感觉能直接玩的工程全部下下来,从中找到了最简单开箱即用的facelib。之后进行了改版,具体干了啥忘记了,readme第一行提供了fork的原版,选方便的玩。
模型云盘,提取码:1111

2.2 facenet

此仓库非常利于对识别应用的学习,和后面几个不同,没有进行层层封装,方便通过代码来了解实现过程。
基于此我搭建了一套完整应用,用于识别的客户端,通信服务器,应用的微信小程序。简答来讲就是因为只有本机有GPU,就把识别功能运行在本地,通过MQTT与服务器通信。一个用于对人脸库增删改查的平台,然后微信小程序用于拍照上传,获得识别结果。
然后进行各种测试,发现误识率比较高,有的时候会将奇怪的地方识别为头像,识别速度比较慢的问题。识别与检测问题只能靠更改模型来解决,于是有了后面了旅程,训练。

2.3 检查图片是否可以被打开

当批处理图片时,最好先对图片进行筛选,判断导入数据是否有不是图片的,干掉它。

1
2
3
4
5
6
7
8
9
10
11
12
13
14
15
16
17
18
19
20
21
22
23
24
25
26
27
28
29
30
31
32
33
34
35
36
37
38
39
40
41
42
43
44
45
46
47
48
49
50
51
52
def cleanCannotOpen(self):
classFolderList = os.listdir(self.iDataPath)
logger.info('分类文件夹总数{}'.format(len(classFolderList)))
imagePathList = []
sampleOfClasses = []
for peopleFolder in classFolderList:
peoplePath = os.path.join(self.iDataPath, peopleFolder)
#判断该路径是否为目录,也即只处理指定目录下的文件夹
if not os.path.isdir(peoplePath):
continue
imageList = os.listdir(peoplePath)
count = 0
for img in imageList:
imagePathList.append(os.path.join(peoplePath, img))
count += 1
if count == 0:
logger.warning('此文件夹 {} 没有找到图片'.format(peoplePath))
sampleOfClasses.append(count)

totalNum = sum(sampleOfClasses)
logger.info("样本总数:{}".format(totalNum))


partSize = totalNum // self.cpuNum
index = 0
for i in range(self.cpuNum):
if i == self.cpuNum - 1:
head = index
clearTask = Process(target=self.tryOpenImg, args=([imagePathList[head:]]))
clearTask.start()
logger.info('多核处理 cpu{} data[{}:]'.format(i, head))
else:
head = index
index = index + partSize
clearTask = Process(target=self.tryOpenImg, args=([imagePathList[head:index]]))
clearTask.start()
logger.info('多核处理 cpu{} data[{}:{}]'.format(i, head, index))

#尝试打开图片,如果无法打开则删除
def tryOpenImg(self,imgPathList):
count = 0
delList = []
for img in imgPathList:
image = cv2.imread(img)
try:
_shape = image.shape
except:
delList.append(img)
os.remove(img)
count += 1
logger.info('任务结束,共完成了 {} 张图,删除数量:{},地址:{}'.format(count,len(delList),delList))

2.4 用paddlehub实现的人脸检测

最简单的人脸检测实现,看这名字也知道是paddle的,需要安装框架

使用的是pyramidbox_face_detection模型

环境安装:

1
2
3
pip install paddlepaddle-gpu -U
# 或者
pip install paddlepaddle -U

只会用到一个函数face_detection

1
2
3
4
5
6
def face_detection(images=None,
paths=None,
use_gpu=False,
output_dir='detection_result',
visualization=False,
score_thresh=0.15)
  • images (list[numpy.ndarray]): 图片数据,ndarray.shape 为 [H, W, C],BGR格式;
  • paths (list[str]): 图片的路径;
  • use_gpu (bool): 是否使用 GPU;
  • output_dir (str): 图片的保存路径
  • visualization (bool): 是否将识别结果保存为图片文件;
  • score_thresh (float): 置信度的阈值。

返回结果示例:

1
[{'data': [{'left': 10.1818208694458, 'top': 2.278272867202759, 'right': 99.08556365966797, 'bottom': 106.69779205322266, 'confidence': 0.9998960494995117}], 'path': 'D:\\code\\face\\bank\\my_test\\dilireba\\1591160438125.jpg'}]

示例代码,用于将一个文件夹中分好类的人脸图裁剪后放到新文件夹中

1
2
3
4
5
6
7
8
9
10
11
12
13
14
15
16
17
18
19
20
21
22
23
24
25
26
27
28
29
30
31
32
33
34
35
36
37
38
39
40
41
42
43
44
45
46
import paddlehub as hub
from tqdm import tqdm
from PIL import Image
import shutil
import os

face_detector = hub.Module(name="pyramidbox_face_detection")

def faceProcess(source,dest):
shutil.rmtree(dest)
if not os.path.isdir(dest):
os.mkdir(dest)
for subfolder in tqdm(os.listdir(source)):
destPeople = os.path.join(dest, subfolder)
sourcePeople = os.path.join(source, subfolder)
#如果此路径未找到文件夹则创建
if not os.path.isdir(destPeople):
os.mkdir(destPeople)
imgList = []
for imageName in os.listdir(sourcePeople):
imgList.append(os.path.join(sourcePeople,imageName))
if(imgList!=[]):
results = face_detector.face_detection(paths=imgList,use_gpu=True,output_dir=destPeople,visualization=False,score_thresh=0.9)
#print(type(results[0]['data']))
print("以检测图片数量:{}".format(len(results)))
for re in results:
if(len(re['data']) >1):
print("此图片找到多张人脸图:{} = {}".format(re['path'],len(re['data'])))
continue
if(len(re['data'])<1):
print("此图片未找到人脸:{} = {}".format(re['path'],len(re['data'])))
continue
x1 = int(re['data'][0]['left'])
y1 = int(re['data'][0]['top'])
x2 = int(re['data'][0]['right'])
y2 = int(re['data'][0]['bottom'])
img = Image.open(re['path'])
box = (x1, y1, x2, y2)
region = img.crop(box)
imgName = os.path.basename(re['path'])
region.save(os.path.join(destPeople, imgName))
return False
else:
print("{}没有图片".format(sourcePeople))

faceProcess("D:\\code\\face\\bank\\my_test","D:\\code\\face\\bank\\my_test_align")

2.5 face.evoLVe的paddle训练模型

原始仓库
实际是操作paddle文件夹,外面使用pytorch,环境还是那一套

  • 对数据进行对齐,进入align文件夹执行,对齐前可以用上面的函数去除掉无法打开的图
    1
    python face_align.py -source_root=D:/code/face/bank/my -dest_root=../data/output_align
  • 设置参数,最外层的config.py文件,主要修改下列参数,其他的根据自己情况改吧。
    1
    2
    3
    4
    5
    DATA_ROOT = './data/output_align', #输入数据的地址
    MODEL_ROOT = './data/train', #模型输出地址
    BATCH_SIZE = 128,#没出处理的图数量,和使用的显存有关
    NUM_EPOCH = 60 #进行多少轮的训练,拟合情况设定
    VAL_DATA_ROOT = 'data/val_align',
  • 开始训练,训练数据我从aligned_vggface2_36w中和web_face两个集合中各取了一万多张图,共507个分类,测试则直接用lfw-align-128数据集,5,751个分类,1W3张图,
    1
    python train.py

acc折线图看得出效果不好
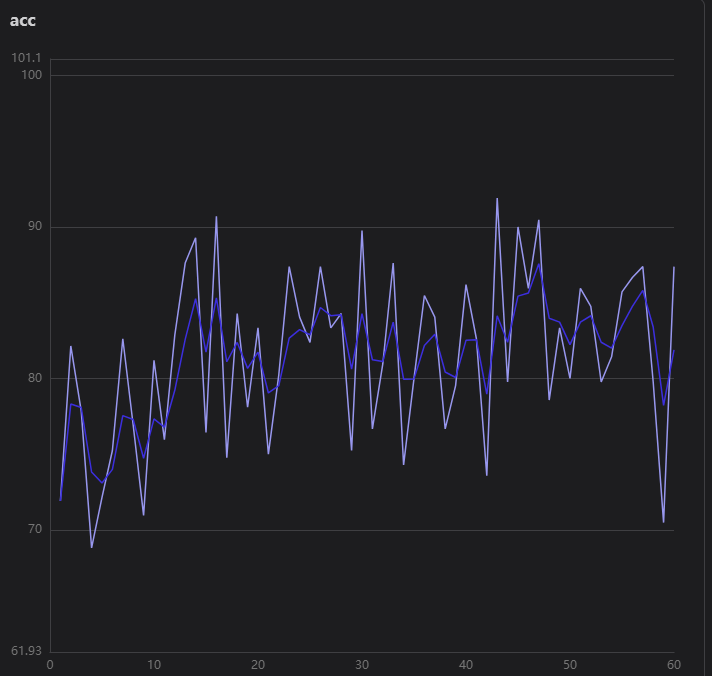
loss从26降低到16,训练结果:

这个模型肯定是不合格的,得继续炼丹,这方面是新手就不深谈了。

2.6 InsightFace的Paddle方式使用

Insight-Face Paddle仓库

InsightFacePaddle就是paddle对insightFace的部署,就和前面face.evoLVe工程中的PaddleInference-demo类似。

安装文档是可以直接通过pip安装

1
pip install --upgrade insightface-paddle

然后通过命令直接使用,用过-h查看参数

1
insightfacepaddle -h

这边还是将仓库克隆下来好一点,源码实际上就insightface_paddle.py一个文件,demo中是示例图片。

模型支持三种:检测的BlazeFace,识别的ArcFace和MobileFace,传参后会自动下载,无需去找模型。
下面是官方示例:
建库,也就是之前那个人脸库

1
python insightface_paddle.py --build_index ./demo/friends/index.bin --img_dir ./demo/friends/gallery --label ./demo/friends/gallery/label.txt

检测

1
python insightface_paddle.py --det --input ./demo/friends/query/friends1.jpg --output ./output

识别,直接对图片进行特征提取匹配

1
python insightface_paddle.py --rec --index ./demo/friends/index.bin --input ./demo/friends/query/Rachel.png

检测并且识别

1
python insightface_paddle.py --det --rec --index ./demo/friends/index.bin --input ./demo/friends/query/friends2.jpg --output ./output

接下里就是改一改,识别自己的图片。首先在demo文件夹中添加my/lib文件夹,将对齐的图片模仿\demo\friends\gallery放在,添加label.txt。注意这个文档格式,地址和名称直接用tab,末尾不要添加多余换行

1
2
3
4
5
6
./dh/1.jpg	dh
./dongming/1.jpg dongming
./dpc/1.jpg dpc
./dpj/1.jpg dpj
./yongfu/1.jpg yongfu

使用命令建库

1
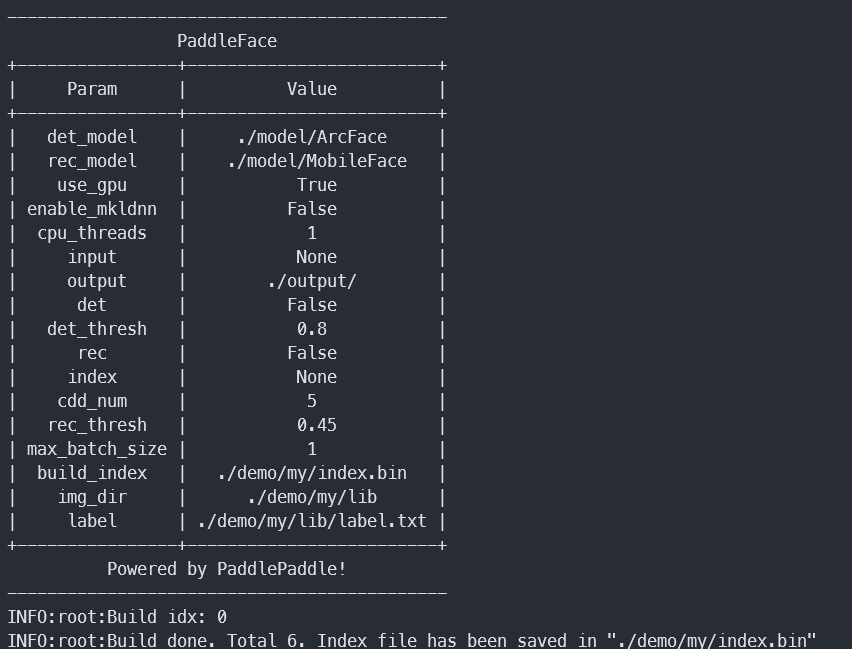
python insightface_paddle.py --build_index ./demo/my/index.bin --img_dir ./demo/my/lib --label ./demo/my/lib/label.txt

然后在demo\my下建立query文件夹用于放在准备识别的图,output放在识别结果。修改一下默认值,懒得贴长命令

1
2
3
"--index", type=str, default="./demo/my/index.bin", help="The path of index file.")

"--output",type=str,default="./demo/my/output",help="The directory of prediction result.")

进行识别

1
python insightface_paddle.py --det --rec  --input ./demo/my/query/5.jpg 

6个人找到了2个人。额。。不晓得最相近人脸的值是多少,阈值只能瞎调看看。之前的facenet可以输出不同脸的差分值,然后看看识别后这个人最相近的人脸差值多少,就很方便调阈值。
将检测阈值调成9,识别阈值调成4,多找到一个。将识别模型修改为ArcFace。需要生成index.bin,否则回报下列错误

1
ValueError: Incompatible dimension for X and Y matrices: X.shape[1] == 128 while Y.shape[1] == 512

结果又多识别出一个人 - -|
应用体验暂时就这么,还是先去看看InsightFace。

2.7 InsightFace

仓库都有13K的start了,之前由于发现是mxnet就完全没去关注,最近发现居然转pytorch了,又看到他也支持paddle,正好目前在用,就来试试。

2.7.1 arcface_paddle

安装有中文文档,这里补充下,在执行下面命令

1
python ppdet/modeling/tests/test_architectures.py

如果报错

1
FileNotFoundError: [Errno 2] No such file or directory: 'configs/yolov3/yolov3_darknet53_270e_coco.yml'

是因为test_architectures.py中地址用的是configs/xxx/xxx,找不到仓库根目录的configs,改下地址就好

上面那个insight-face-paddle实际上在这里面也有,对应文件在insightface\recognition\arcface_paddle\tools目录下的test_recognition.py,对比了下代码,test_recognition中裁剪掉了生产人脸库bin的功能,其他都是一样的。
但是感觉用起来相当的麻烦,用原版看看了。

2.7.2 原版

环境

可以直接pip安装,也可以直接调用insightface\python-package\insightface目录下的代码
仓库中也有个readme说明。
运行环境:

1
pip install onnxruntime-gpu

insightface包的依赖,如果不通过pip install Cython insightface安装则需要手动去安装下面的包

1
2
3
4
5
6
7
8
9
10
11
12
13
'numpy',
'onnx',
'tqdm',
'requests',
'matplotlib',
'Pillow',
'scipy',
'scikit-learn',
'scikit-image',
'easydict',
'cython',
'albumentations',
'prettytable',

如果之后执行报错

1
ImportError: cannot import name 'mesh_core_cython' from 'insightface.thirdparty.face3d.mesh.cython' (unknown location)

需要进入insightface\python-package\insightface\thirdparty\face3d\mesh\cython目录下安装setup

1
python setup.py build_ext -i
试用

在insightface\python-package目录下有测试文件test.py,填入

1
2
3
4
5
6
7
8
9
10
11
12
13
import cv2
import numpy as np
import insightface
from insightface.app import FaceAnalysis
from insightface.data import get_image as ins_get_image

app = FaceAnalysis(providers=['CUDAExecutionProvider', 'CPUExecutionProvider'])
app.prepare(ctx_id=0, det_size=(640, 640))
img = ins_get_image('t1') #使用示例图片/insightface/python-package/insightface/data/images/t1.jpg
faces = app.get(img)
print("faces", faces)
rimg = app.draw_on(img, faces)
cv2.imwrite("./output.jpg", rimg)

然后执行

1
python test.py

打印一大堆,然后生产output.jpg

如果报错

1
Could not locate zlibwapi.dll. Please make sure it is in your library path!

下载对应缺少文件,提取码u367,将zlibwapi.lib放到NVIDIA GPU Computing Toolkit\CUDA\v11.6\lib\x64下,将zlibwapi.dll放到NVIDIA GPU Computing Toolkit\CUDA\v11.6\bin下

使用

对比两张脸的差距

1
2
3
4
5
6
7
8
9
10
11
12
13
14
15
16
17
18
19
20
21
22
23
24
import cv2
import insightface
import numpy as np
from sklearn import preprocessing

model = insightface.app.FaceAnalysis(root='./',allowed_modules=None,
providers=['CUDAExecutionProvider'])
model.prepare(ctx_id=0, det_thresh=0.50, det_size=(640, 640))

img = cv2.imdecode(np.fromfile('feng.jpg', dtype=np.uint8), -1)
img2 = cv2.imdecode(np.fromfile('feng1.jpg', dtype=np.uint8), -1)

face = model.get(img)
face2 = model.get(img2)

embedding = np.array(face[0].embedding).reshape((1, -1))
embedding = preprocessing.normalize(embedding)

embedding2 = np.array(face2[0].embedding).reshape((1, -1))
embedding2 = preprocessing.normalize(embedding2)

diff = np.subtract(embedding, embedding2)
dist = np.sum(np.square(diff), 1)
print("dist={}".format(dist))

检测群体照,代码参考来源,感谢此大佬的博客,唯一找到的应用示例,不晓得为啥官方没给个完整的例子

1
2
3
4
5
6
7
8
9
10
11
12
13
14
15
16
17
18
19
20
21
22
23
24
25
26
27
28
29
30
31
32
33
34
35
36
37
38
39
40
41
42
43
44
45
46
47
48
49
50
51
52
53
54
55
56
57
58
59
60
61
62
63
64
65
66
67
68
69
70
71
72
73
74
75
76
77
78
79
80
81
82
83
84
85
86
87
88
89
90
91
92
93
94
95
96
97
98
99
100
101
102
103
104
105
106
107
108
109
110
111
112
113
114
115
116
117
118
119
120
121
122
123
124
125
126
127
128
129
130
131
132
133
134
135
136
137
138
139
140
141
142
143
144
145
146
147
148
149
150
151
152
153
154
155
156
157
158
159
160
161
162
163
164
165
166
167
168
169
170
171
172
173
174
175
176
import os
import cv2
import insightface
import numpy as np
from sklearn import preprocessing
from PIL import ImageDraw, ImageFont, Image

#在图上绘制字符
def drawImgText(img, text, position, textColor=(0, 255, 0), textSize=30):
if (isinstance(img, np.ndarray)): # 判断是否OpenCV图片类型
img = Image.fromarray(cv2.cvtColor(img, cv2.COLOR_BGR2RGB))
draw = ImageDraw.Draw(img)
fontStyle = ImageFont.truetype(
"simsun.ttc", textSize, encoding="utf-8")
draw.text(position, text, textColor, font=fontStyle)
return cv2.cvtColor(np.asarray(img), cv2.COLOR_RGB2BGR)

def drawImg(img, results):
dimg = img.copy()
for result in results:
box = result["bbox"]
color = (0, 0, 255)
cv2.rectangle(dimg, (box[0], box[1]), (box[2], box[3]), color, 2)
dimg = drawImgText(dimg,'{}'.format(result["name"]),(box[0]-1, box[1]-4),(0,255,0),30)
return dimg


class FaceRecognition:
def __init__(self, gpu_id=0, face_db='face_db', threshold=1.24, det_thresh=0.50, det_size=(640, 640)):
"""
人脸识别工具类
:param gpu_id: 正数为GPU的ID,负数为使用CPU
:param face_db: 人脸库文件夹
:param threshold: 人脸识别阈值
:param det_thresh: 检测阈值
:param det_size: 检测模型图片大小
"""
self.gpu_id = gpu_id
self.face_db = face_db
self.threshold = threshold
self.det_thresh = det_thresh
self.det_size = det_size

# 加载人脸识别模型,当allowed_modules=['detection', 'recognition']时,只单纯检测和识别
self.model = insightface.app.FaceAnalysis(root='./',
allowed_modules=None,
providers=['CUDAExecutionProvider'])
self.model.prepare(ctx_id=self.gpu_id, det_thresh=self.det_thresh, det_size=self.det_size)
# 人脸库的人脸特征
self.faces_embedding = list()
# 加载人脸库中的人脸
self.load_faces(self.face_db)

# 加载人脸库中的人脸
def load_faces(self, face_db_path):
if not os.path.exists(face_db_path):
os.makedirs(face_db_path)
for root, dirs, files in os.walk(face_db_path):
for file in files:
input_image = cv2.imdecode(np.fromfile(os.path.join(root, file), dtype=np.uint8), 1)
user_name = file.split(".")[0]
face = self.model.get(input_image)[0]
embedding = np.array(face.embedding).reshape((1, -1))
embedding = preprocessing.normalize(embedding)
self.faces_embedding.append({
"user_name": user_name,
"feature": embedding
})

# 人脸识别
def recognition(self, image):
faces = self.model.get(image)
results = list()
for face in faces:
# 开始人脸识别
embedding = np.array(face.embedding).reshape((1, -1))
embedding = preprocessing.normalize(embedding)
user_name = "unknown"
for com_face in self.faces_embedding:
r = self.feature_compare(embedding, com_face["feature"], self.threshold)
if r:
user_name = com_face["user_name"]
results.append(user_name)


return results

@staticmethod
def feature_compare(feature1, feature2, threshold):
diff = np.subtract(feature1, feature2)
dist = np.sum(np.square(diff), 1)
if dist < threshold:
return True
else:
return False

def register(self, image, user_name):
faces = self.model.get(image)
if len(faces) != 1:
return '图片检测不到人脸'
# 判断人脸是否存在
embedding = np.array(faces[0].embedding).reshape((1, -1))
embedding = preprocessing.normalize(embedding)
is_exits = False
for com_face in self.faces_embedding:
r = self.feature_compare(embedding, com_face["feature"], self.threshold)
if r:
is_exits = True
if is_exits:
return '该用户已存在'
# 符合注册条件保存图片,同时把特征添加到人脸特征库中
cv2.imencode('.jpg', image)[1].tofile(os.path.join(self.face_db, '%s.jpg' % user_name))
self.faces_embedding.append({
"user_name": user_name,
"feature": embedding
})
return "success"

# 检测人脸
def detect(self, image):
faces = self.model.get(image)
#rimg = self.model.draw_on(image,faces)
#cv2.imwrite("./output.jpg", rimg)
results = list()
for face in faces:
result = dict()
# 获取人脸属性
result["bbox"] = np.array(face.bbox).astype(np.int32).tolist()
result["kps"] = np.array(face.kps).astype(np.int32).tolist()
result["landmark_3d_68"] = np.array(face.landmark_3d_68).astype(np.int32).tolist()
result["landmark_2d_106"] = np.array(face.landmark_2d_106).astype(np.int32).tolist()
result["pose"] = np.array(face.pose).astype(np.int32).tolist()
result["age"] = face.age
gender = '男'
if face.gender == 0:
gender = '女'
result["gender"] = gender
# 开始人脸识别
embedding = np.array(face.embedding).reshape((1, -1))
embedding = preprocessing.normalize(embedding)
result["embedding"] = embedding
#对比人脸库
user_name = "unknown"
for com_face in self.faces_embedding:
r = self.feature_compare(embedding, com_face["feature"], self.threshold)
if r:
user_name = com_face["user_name"]
result["name"] = user_name
results.append(result)
return results


if __name__ == '__main__':
img = cv2.imdecode(np.fromfile('D:\\code\\face\\bank\\testFace\\group\\5.jpg', dtype=np.uint8), -1)
face_recognitio = FaceRecognition()
# 人脸注册
# result = face_recognitio.register(img, user_name='feng')
# print(result)
# 人脸识别
#results = face_recognitio.recognition(img)

# for result in results:
# print("识别结果:{}".format(result))

results = face_recognitio.detect(img)
rimg = drawImg(img,results)
cv2.imwrite("./output.jpg", rimg)
for result in results:
print("识别结果:{}".format(result["name"]))
print('人脸框坐标:{}'.format(result["bbox"]))
#print('人脸五个关键点:{}'.format(result["kps"]))
#print('人脸3D关键点:{}'.format(result["landmark_3d_68"]))
#print('人脸2D关键点:{}'.format(result["landmark_2d_106"]))
#print('人脸姿态:{}'.format(result["pose"]))
print('年龄:{}'.format(result["age"]))
print('性别:{}'.format(result["gender"]))

使用了几张集体照来测试,效果非常好,库中对象都识别出来,并且没有误识别的问题。

可能遇到的问题

  • InsightFace paddle执行示例时报错

    1
    2
    3
      File "D:\Anaconda3\envs\paddle\lib\site-packages\numpy\core\fromnumeric.py", line 57, in _wrapfunc
    return bound(*args, **kwds)
    ValueError: kth(=-1) out of bounds (6)

    –cdd_num参数设置问题

    1
    2
    3
    4
    5
    6
    parser.add_argument(
    "--cdd_num",
    type=int,
    default=6,
    help="The number of candidates in the recognition retrieval. Default by 5."
    )
  • 使用InsightFace的警告

    1
    To use the future default and silence this warning we advise to pass `rcond=None`, to keep using the old, explicitly pass `rcond=-1`.

    没啥关系,看着烦可以取消

    1
    2
    import numpy as np
    np.warnings.filterwarnings('ignore')

    或者如描述添加

    1
    lstsq(A,b,rcond=None)

人脸识别
https://blog.kala.love/posts/8c96683c/
作者
久远·卡拉
发布于
2022年11月2日
许可协议