本文最后更新于 2026年4月17日 早上
1. 前言
主要是想将hexo弄到群晖NAS中去,但是又不想在原本系统中操作,发现里面有docker的应用,就顺便学习学习,捣鼓一下咯。几年前就在同学那里听说了docker,但是一直没机会接触。
2. 目的
- 学习docker
- 使用docker让hexo在群晖里面跑起来,达到在局域网内使用,定时更新。
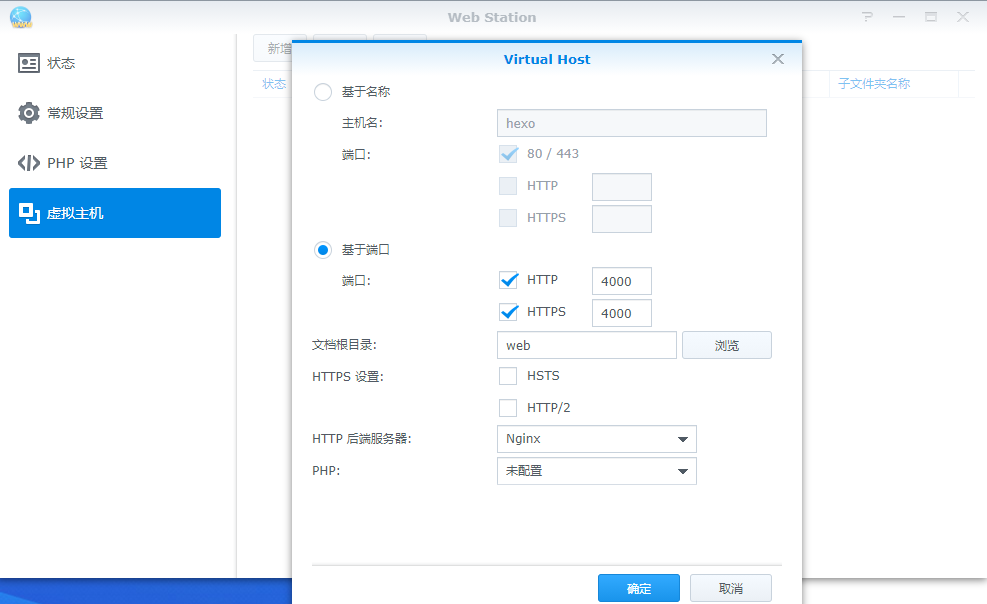
这里插一句,其实群晖搭建网站有个更加简单的方式,就是直接用Web Station套件。然后定时拉去github仓库里面最新的部署文件。几分钟完美达到目的。。。。所以本文主要还是学习用用docker啦- -|,其实一开始不是这么想的,蠢哭了。
3. 实现
3.1 手动做一个hexo的镜像
1
| docker run -i -t hexo-node /bin/bash
|
1
2
3
| apt-get update
apt-get install git -y
npm install -g hexo-cli
|
1
2
3
| mkdir HexoBlog
cd HexoBlog
mkdir blog
|
1
2
3
| git config --global user.name "lissettecarlr"
git config --global user.email lissettecarlr@163.com
git clone -b blog https:
|
1
2
3
| cd blog
hexo init
npm install --save hexo-deployer-git
|
1
2
3
4
5
6
| rm -r source
rm -r themes
rm _config.yml
cp ../lissettecarlr.github.io/_config.yml ./_config.yml
cp -r ../lissettecarlr.github.io/source ./
cp -r ../lissettecarlr.github.io/themes ./
|
1
| docker commit ID hexo-node
|
- 运行
1
| docker run --name blog -i -t -p 4000:4000 hexo-node /bin/bash -c "cd HexoBlog/blog;hexo s"
|
1
2
3
| INFO Validating config
INFO Start processing
INFO Hexo is running at http://localhost:4000 . Press Ctrl+C to stop.
|
3.2 使用Dockerfile构建
- 首先拉取nodejs
- 然后使用Dockerfile构建
1
2
3
4
5
6
7
8
9
10
11
12
13
14
15
16
17
18
19
20
21
22
23
24
25
26
27
28
29
30
31
| FROM node:latest
ENV HEXO_SERVER_PORT=4000
WORKDIR /HexoBlog
EXPOSE 4000
RUN \
apt-get update && \
git config --global user.name "lissettecarlr" && \
git config --global user.email [email protected] && \
git clone -b blog https://github.com/lissettecarlr/lissettecarlr.github.io.git && \
mkdir Blog && cd Blog && \
npm install -g npm && \
npm install -g hexo-cli && \
hexo init && \
npm install --save hexo-deployer-git
CMD \
rm -r ./lissettecarlr.github.io && \
git clone -b blog https://github.com/lissettecarlr/lissettecarlr.github.io.git && \
cd Blog && \
rm -r source && \
rm -r themes && \
rm _config.yml && \
cp ../lissettecarlr.github.io/_config.yml ./_config.yml && \
cp -r ../lissettecarlr.github.io/source ./ && \
cp -r ../lissettecarlr.github.io/themes ./ && \
echo "config over" && \
hexo s
|
1
| docker bulid -t hexo_img .
|
- 最后运行起来
1
| docker run -i -t --name "hexo-test" -p 4000:4000 hexo_img
|
4. 其他
4.1 Dockerfile
- CMD:运行起来后执行的命令,执行完毕则容器生命周期结束
- EXPOSE 暴露端口
- VOLUME 指定映射文件
- ENV指定变量全时段有效
- ARG指定变量只在构建的时候生效
4.2 docker基本命令
4.3 docker换源
1
| vim /etc/docker/daemon.json
|
填入
1
2
3
4
5
6
7
8
9
| {
"registry-mirrors" : [
"https://registry.docker-cn.com",
"http://hub-mirror.c.163.com",
"https://docker.mirrors.ustc.edu.cn",
"https://cr.console.aliyun.com",
"https://mirror.ccs.tencentyun.com"
]
}
|
重启服务
1
2
| systemctl daemon-reload
systemctl restart docker.service
|