Tesseract文本识别引擎

本文最后更新于:2023年2月28日 上午

Tesseract是一个开源文本识别(OCR)引擎,各个平台能都使用。48K的start给了我满满的安心感,还不需要装环境,本文是对其的尝试。

win下的快速使用

我然后是在windows环境下操作,其他环境自己去看文档,官方说明也是挺完善的。

首先下载exe:

新建一个文件夹然后安装地址选择它,例如D:\code\tesseract_ocr。我们要执行的命令就在里面。

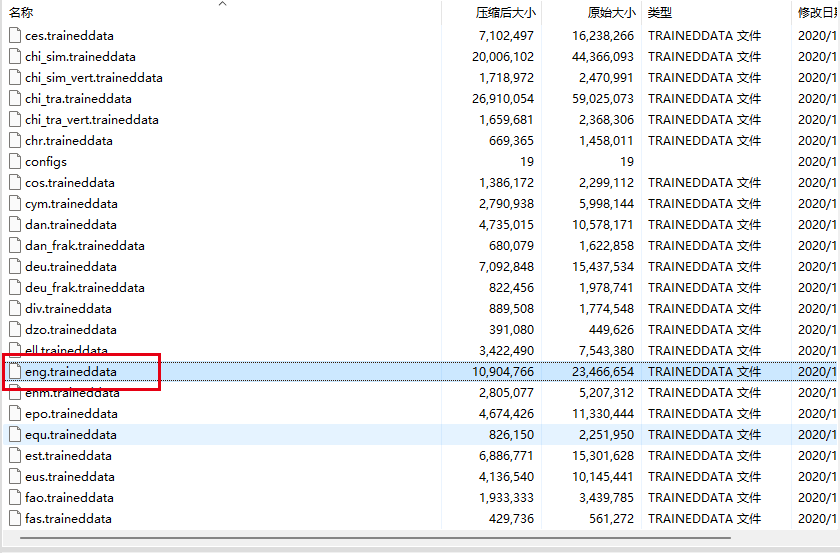
之后需要下载训练数据,有三种,tessdata-fasttessdatatessdata-best,速度由快到慢,识别率则是由低到高。我这里选择tessdata,下载下来后里面不同文件是不同语言,这里选择英文进行识别

让此文件扔到D:\code\tesseract_ocr\tessdata下,然后就可以开始识别了。我这里截了个图如下

将其扔进了tesseract_ocr文件夹中,命名为test.png。然后在此目录下执行命令

1
./tesseract.exe ./test.png out -l eng  

结果被保存到命令目录下的out.txt中:

1
2
MSYS2 is a collection of tools and libraries providing you with an easy-to-use environment for building,
installing and running native Windows software.

支持语言

官方表格
这里列几个常用的

  • chi_sim 简体中文
  • chi_sim_vert 简体中文垂直
  • chi_tra 繁体中文
  • eng 英文
  • jpn 日语
  • kor 韩语

参数

详细可见官方文档,这里只列几个常用的

-l LANG

选择识别模型,也就是tessdata文件夹里面的.traineddata,可以用–list-langs来查看可选项

–dpi N

该设置和图像分辨率有关,通常设置300,如果不设置会从图片信息中获取,获取不到就瞎猜。

–psm N

  • 0方向和脚本检测(OSD)。
  • 1自动页面分割与OSD。
  • 2自动页面分割,但没有OSD,或OCR。
  • 3全自动页面分割,但没有OSD。(默认)
  • 4假设有一列不同大小的文本。
  • 5假设有一个垂直对齐的统一文本块。
  • 6假设只有一个统一的文本块。
  • 7将图像视为单个文本行。
  • 8将图像视为一个单词。
  • 9将图像视为一个圆圈中的单个单词。
  • 10将图像视为单个字符。
  • 11稀疏文本。找到尽可能多的文本,没有特定的顺序。带有OSD的稀疏文本。
  • 13粗线。将图像视为单个文本行
  • 这边测试单个数字识别中8,9,13表现最好,6,7,10次之,其他没法用。这只是针对这个应用,其他识别可不同。

一些测试

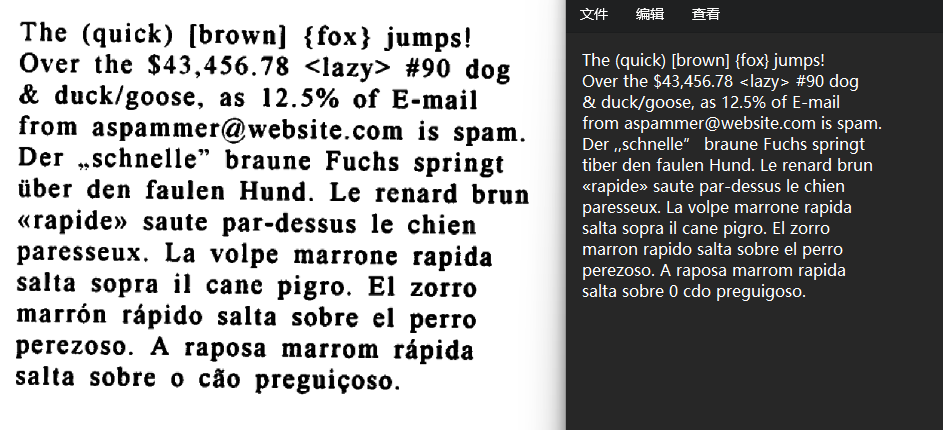
这里选择了best

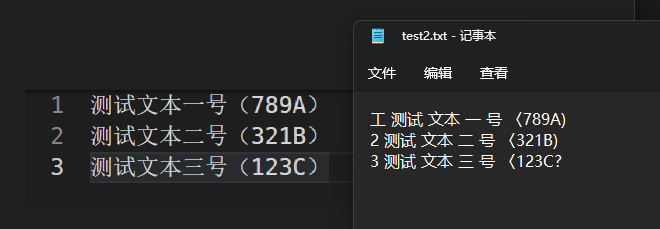
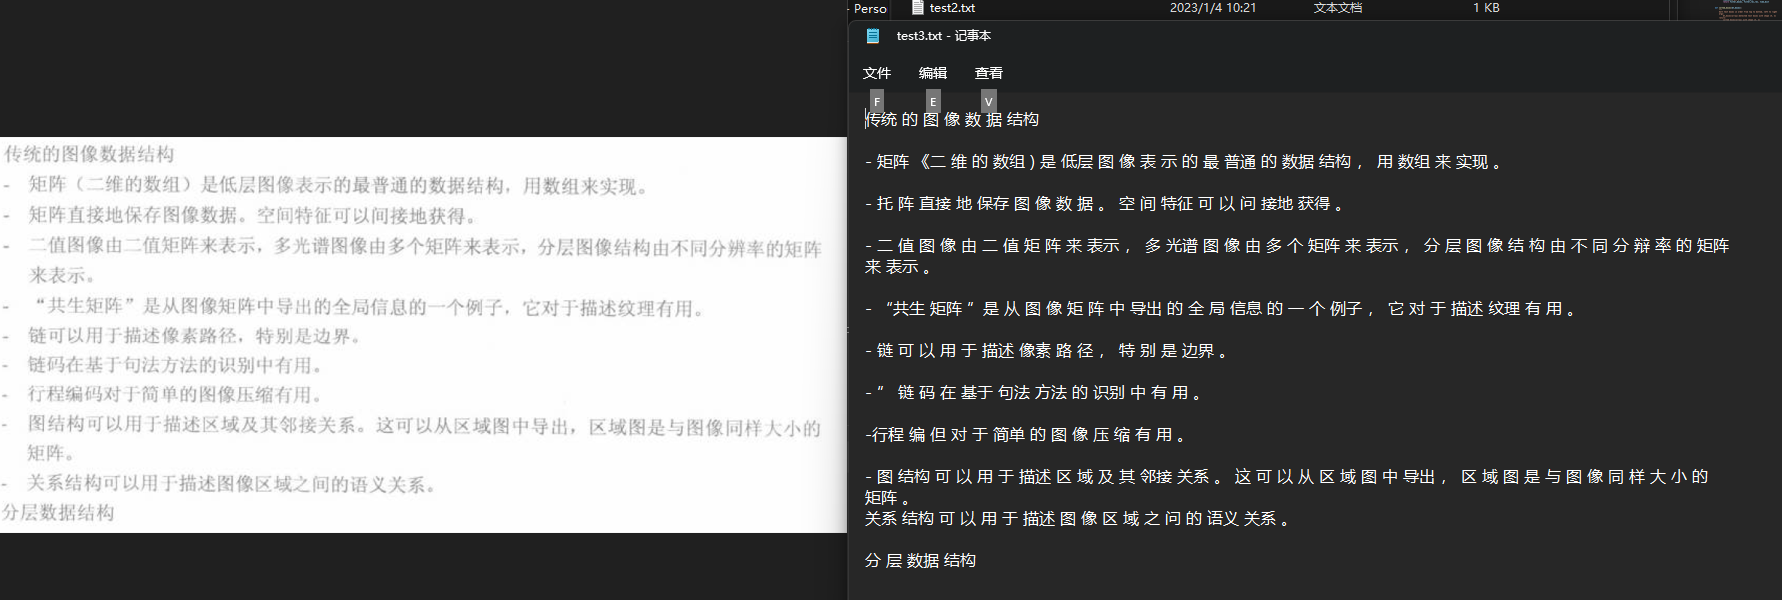
Tesseract没法识别背景复杂的环境,这点的确paddleOcr强上不少,但是对应简单背景识别的速度和准确率还是可以,最关键是它不需要配paddle的环境,对某些应用的确方便许多。

python下

安装包

1
pip install pytesseract

同样还是需要tesseract的可执行程序,如果没有加入环境变量,则代码中添加

1
pytesseract.pytesseract.tesseract_cmd = r'D:\\code\\tesseract_ocr'

打印可以选择的模型,也就是tessdata文件夹中的

1
2
import pytesseract
print(pytesseract.get_languages(config=''))

结果:

1
['chi_sim', 'chi_sim_vert', 'eng', 'jpn', 'osd']

选择模型进行识别

1
print(pytesseract.image_to_string(Image.open('E:\\数据集\\手写数字\\zy\\23.png'), lang='mnist'))

自定义配置

1
2
3
ocr_config = r'--dpi 300 --psm 6'
print(pytesseract.image_to_string(Image.open('E:\\数据集\\手写数字\\zy\\23.png'), lang='mnist' ,config=ocr_config))

手写数字识别

mnist训练出来的模型
使用了一万张非mnist数据集的手写数字图来测试,准确率在90%左右,将图片变形为28X28能提高准确率

以下我是用来测试不同模型和准确率的代码

1
2
3
4
5
6
7
8
9
10
11
12
13
14
15
16
17
18
19
20
21
22
23
24
25
26
27
28
29
30
31
32
33
34
35
36
37
38
39
40
41
42
43
44
45
46
47
48
49
50
51
52
53
54
55
56
57
58
59
60
61
62
63
64
65
66
67
68
69
70
71
72
73
74
75
76
77
78
79
80
81
82
83
84
85
86
87
88
89
90
91
92
93
94
95
96
97
98
99
100
101
102
103
104
105
106
107
import pytesseract
from PIL import Image
import os
import time
from tqdm import tqdm

# 测试所有模型
def checkMode():
modes = pytesseract.get_languages(config='')
for mode in modes:
print("******测试模型:{} ********".format(mode))
#checkAccuracy(mode)
checkAccuracyLable(mode)

# 通过文件夹下的图片测试模型准确率,文件夹下的图片名字为标注
def checkAccuracy(mode="mnist",filePath = "./手写数字测试集/"):
filse = os.listdir(filePath)
ocr_config = r'--dpi 300 --psm 6'
print("******测试模型:{} ********".format(mode))
accuracy = 0
errorFile = []
nnecessary = 0
for file in filse:
if(file.strip().split(".")[1] != "jpg" and file.strip().split(".")[1] != "png"):
nnecessary +=1
continue
result = pytesseract.image_to_string(Image.open(filePath+file), lang=mode ,config=ocr_config)
result = result.replace(" ","")
result = result.replace("\n","")
result = result.replace("\t","")
result = result.replace("\r","")

if(result == file.split(".")[0]):
accuracy += 1
else:
errorMsg = "file : {} , result:{}".format(file,result)
errorFile.append(errorMsg)

rate = accuracy / (len(filse) - nnecessary)
print("正确率:{} , 错误文件:{}".format(rate,errorFile))

# 加载lable 返回文件地址和标注
def readLabelTxt(data_dir):
filenames = []
labels = []
with open(data_dir) as f:
dir_labels = [line.strip().split('\t') for line in f.readlines()]
for filename, label in dir_labels:
filenames.append(filename)
labels.append(label)
return filenames, labels

# 通过Lable文件来测试准确率
def checkAccuracyLable(mode = "mnist"):
lablePath = "D:\\code\\ggggg\\ocrTrain\\paddle\\dataset2\\test.txt"
dataPath = "D:\\code\\ggggg\\ocrTrain\\paddle\\dataset2"
imgPath,labels = readLabelTxt(lablePath)

logFilePath = mode + "-log.txt"
if(os.path.exists(logFilePath)):
os.remove(logFilePath)

logFile = open(logFilePath,"a+")

ocr_config = r'--dpi 300 --psm 6 -c tessedit_char_whitelist=1234567890'
totleImg = len(imgPath) #加载数据个数
accuracy = 0 #识别准确个数
checkImg = 0 #实际识别个数

msg = "测试图片总数量:{}".format(totleImg)
print(msg)
logFile.write(msg + "\n")

for pos in tqdm(range(totleImg)):
checkImgPath = os.path.join(dataPath,imgPath[pos][2:])
# 如果不是文件
if not os.path.isfile(checkImgPath):
msg = "不是文件:{}".format(checkImgPath)
logFile.write(msg+ "\n")
#print(msg)
continue
try:
result = pytesseract.image_to_string(Image.open(checkImgPath), lang=mode ,config=ocr_config)
except Exception as ex:
print("异常:{}".format(ex))
continue
checkImg +=1
result = result.replace("\n","")
if(result == labels[pos]):
accuracy += 1
else:
msg = "result = {}, labels = {} , img:{}".format(result,labels[pos].strip().replace(",",""),checkImgPath)
#print(msg)
logFile.write(msg+ "\n")

# if(pos == 20):
# break

msg = "实际识别图片数:{},正确率:{}".format(checkImg,accuracy/checkImg)
logFile.write(msg+ "\n")
print(msg)

if __name__ == "__main__":
#checkAccuracyLable()
#checkMode()
a = "E:\\数据集\\手写数字\\penbox\\"
checkAccuracy(filePath = "D:\\code\\TEST\\opencvTest\\resultImg\\")

提供准确率

官方有给出一些方式,在发现这个文档之前,自己也进行了一些处理,其实大差不差。核心思想就是将图片变得和训练时候的图近似。
以下代码是一个将透明原图转化为白底黑字,然后拆分单字符进行识别的示例,里面很多参数是需要调的,所有这仅仅是个示例!

1
2
3
4
5
6
7
8
9
10
11
12
13
14
15
16
17
18
19
20
21
22
23
24
25
26
27
28
29
30
31
32
33
34
35
36
37
38
39
40
41
42
43
44
45
46
47
48
49
50
51
52
53
54
55
56
57
58
59
60
61
62
63
64
65
66
67
68
69
70
71
72
73
74
75
76
77
78
79
80
81
82
83
84
85
86
87
88
89
90
91
92
93
94
95
96
97
98
99
100
101
102
103
104
105
106
107
108
109
110
111
112
113
114
115
116
117
118
119
120
121
122
123
124
125
126
127
128
129
130
131
132
133
134
135
136
137
import cv2
import numpy as np
import time
import random

def detCut(imgPath,savePath="./result",show = False):

# 将透明背景图片转换为白色背景
start_time = time.time()
image = cv2.imread(imgPath,-1)
if(len(image[0,0]) >= 4):
image[image[:,:,3]==0] = [255,255,255,255]
end_time = time.time()
elapsed_time = end_time - start_time
print(f"透明背景转白色耗时:{elapsed_time:.3f}秒")

if(show):
cv2.imshow("白底黑字", image)
cv2.waitKey(0)
# cv2.imwrite("白底黑字.png",image)

# 灰度
start_time = time.time()
gray = cv2.cvtColor(image, cv2.COLOR_BGR2GRAY) #灰度
#thresh = cv2.adaptiveThreshold(gray, 255, cv2.ADAPTIVE_THRESH_MEAN_C, cv2.THRESH_BINARY, 21, 25)
end_time = time.time()
elapsed_time = end_time - start_time
print(f"灰度耗时为:{elapsed_time:.3f}秒")

# 二值化
start_time = time.time()
ret, binary = cv2.threshold(gray, 0, 255, cv2.THRESH_OTSU | cv2.THRESH_BINARY_INV)
end_time = time.time()
elapsed_time = end_time - start_time
print(f"二值化耗时为:{elapsed_time:.3f}秒")

if(show):
cv2.imshow("二值化", binary)
cv2.waitKey(0)
# cv2.imwrite("二值化.png",binary)

# 腐蚀核 去除边缘毛刺
# erode_kernel = cv2.getStructuringElement(cv2.MORPH_RECT, (2, 2))
# # 腐蚀 去除噪点
# erosion = cv2.erode(binary, erode_kernel, iterations=1)

# 开运算,先腐蚀后膨胀
# re_kernel = cv2.getStructuringElement(cv2.MORPH_RECT, (4, 4))
# opening = cv2.morphologyEx(binary, cv2.MORPH_OPEN, re_kernel)

# cv2.imshow("erosion", erosion)
# cv2.waitKey(0)
# cv2.imwrite("erosion.png",erosion)

start_time = time.time()
# 膨胀核
dilation_kernel = cv2.getStructuringElement(cv2.MORPH_RECT, (1, 1))
# 膨胀
dilation = cv2.dilate(binary, dilation_kernel, iterations = 1)
end_time = time.time()
elapsed_time = end_time - start_time
print(f"膨胀耗时为:{elapsed_time:.3f}秒")

if(show):
cv2.imshow("膨胀.png",binary)
cv2.waitKey(0)

# 文本检测
start_time = time.time()
contours, hierarchy = cv2.findContours(dilation, cv2.RETR_EXTERNAL,
cv2.CHAIN_APPROX_NONE)
end_time = time.time()
elapsed_time = end_time - start_time
print(f"轮廓耗时为:{elapsed_time:.2f}秒")

# 绘图
im2 = image.copy()
color = [(0, 0, 255), (0, 255, 0), (255, 0, 0),(0,0,0)] # 红 绿 蓝 黑

# 右下坐标系
# rect = cv2.rectangle(im2, (155, 277), (155 + 339, 277 + 10),(255, 0, 0), 2)
a =0
fileName = imgPath.split("\\")[-1].split(".")[0]
for cnt in contours:
x, y, w, h = cv2.boundingRect(cnt)
# print("x={},y={},w={},h={}".format(x,y,w,h))
rect = cv2.rectangle(im2, (x, y), (x + w, y + h), color[a], 2)
a= a+1
#截取
crop_img = dilation[y:y+h, x:x+w]
originW = crop_img.shape[1]
originH = crop_img.shape[0]
# print("originW={},originH={}".format(originW,originH))

#如果高度大于28*2,就再次膨胀
# if originH > 28*2:
# diameter = int(originH/28)
# print("再次膨胀 {}".format(diameter))
# dilation_kernel = cv2.getStructuringElement(cv2.MORPH_RECT, (diameter, diameter))
# # 膨胀
# crop_img = cv2.dilate(crop_img, dilation_kernel, iterations = 1)

#变为白底黑字
crop_img = cv2.bitwise_not(crop_img)
#保存
#cv2.imwrite(str(a)+".png",crop_img)
#改变大小
newH = 24
newW = int(originW * newH / originH)
crop_img = cv2.resize(crop_img, (newW, newH))
#保存
#cv2.imwrite(str(a)+"_resize.png",crop_img)
#补充白边
crop_img =cv2.copyMakeBorder(crop_img, 2, 2, 4, 4, cv2.BORDER_CONSTANT, value=[255,255,255])
#保存
#cv2.imwrite(str(a)+"_white.png",crop_img)

# 查看文件夹是否存在
if not os.path.exists(savePath):
os.makedirs(savePath)
#outName = imgPath.split("\\")[-1].split(".")[0] + "_result.jpg"
outName = fileName + "_" +str(a) +".jpg"
print("输出: {}".format(os.path.join(savePath,outName)))
cv2.imwrite(os.path.join(savePath,outName),crop_img)

if(show):
cv2.imshow("结果.png",rect)
cv2.waitKey(0)

import os
# 将指定文件夹中图片全部转化
def changeImgFolder(ImgFolderPath,outPath):
for root, dirs, files in os.walk(ImgFolderPath):
for file in files:
if file.endswith(".png"):
#print(os.path.join(root, file))
detCut(os.path.join(root, file),outPath)

Tesseract文本识别引擎
https://blog.kala.love/posts/3e7d72b6/
作者
Lissettecarlr
发布于
2023年1月4日
许可协议