本文最后更新于 2024年10月8日 早上
记录目前用到的github actions流程,根据后续使用慢慢更新。
基础
官方文档
GitHub Actions 是 GitHub 提供的一种持续集成和持续部署(CI/CD)服务。它可以帮助开发者自动化软件开发工作流程,从代码测试到部署,全部在 GitHub 仓库中完成。
一些用处:
- 自动化测试:每次提交代码后,自动运行测试,确保代码的正确性。
- 持续集成:在每次代码变更时,自动构建和测试项目,保证代码的稳定性。
- 持续部署:在代码通过测试后,自动部署到生产环境或其他服务器。
- 工作流自动化:可以根据特定事件(如代码提交、Pull Request 等)触发自定义工作流。
- 提高效率:减少手动操作,节省时间,提高开发效率。
GitHub Actions 使用 YAML 格式的配置文件,通常命名为 .github/workflows/<workflow-name>.yml
以下是一些基本的标签:
- name: 定义工作流的名称,便于识别。
- on: 指定触发工作流的事件,可以是
push、pull_request、schedule 等。
- jobs: 包含一个或多个工作,每个工作包含多个步骤。
- runs-on: 指定运行环境,比如
ubuntu-latest。
- steps: 定义工作中的具体步骤,可以使用已有的 actions 或者自定义命令。
触发事件
由on标签定义,下列是一些常见示例
推送到分支时触发:
1
2
3
4
| on:
push:
branches:
- main
|
每天凌晨1点时触发:
1
2
3
| on:
schedule:
- cron: '0 1 * * *'
|
手动触发
新版本发布触发
1
2
3
| on:
release:
types: [published]
|
应用
编译镜像推送到docker hub
需要先在docker hub上创建账号,得到用户名和密码,然后到github仓库中添加这两个参数,进入Settings->Secrets and variables->Actions然后在默认的Secrets标签下,点击New repository secret,例如创建DOCKER_USERNAME和DOCKER_PASSWORD来保存。
仓库中创建文件.github\workflows\docker-publish.yml
1
2
3
4
5
6
7
8
9
10
11
12
13
14
15
16
17
18
19
20
21
22
23
24
25
26
27
28
29
30
31
32
33
34
35
36
37
38
39
40
41
42
43
44
45
46
47
48
49
50
51
52
53
54
55
56
57
58
59
| name: Build and Push Docker Image
on:
  release:
   types: [published]
workflow_dispatch:
inputs:
name:
description: 'reason'
required: false
jobs:
push_to_registry:
name: Push Docker image to Docker Hub
runs-on: ubuntu-latest
permissions:
packages: write
contents: read
steps:
- name: Checkout repository
uses: actions/checkout@v3
- name: Log in to Docker Hub
uses: docker/login-action@v2
with:
username: ${{ secrets.DOCKER_USERNAME }}
password: ${{ secrets.DOCKER_PASSWORD }}
- name: Extract metadata (tags, labels) for Docker
id: meta
uses: docker/metadata-action@v4
with:
images: lissettecarlr/test_action
tags: |
type=raw,value=latest
type=ref,event=tag
- name: Set up QEMU
uses: docker/setup-qemu-action@v2
- name: Set up Docker Buildx
uses: docker/setup-buildx-action@v2
- name: Build and push Docker image
uses: docker/build-push-action@v4
with:
context: .
platforms: linux/amd64
push: true
tags: ${{ steps.meta.outputs.tags }}
labels: ${{ steps.meta.outputs.labels }}
cache-from: type=gha
cache-to: type=gha,mode=max
|
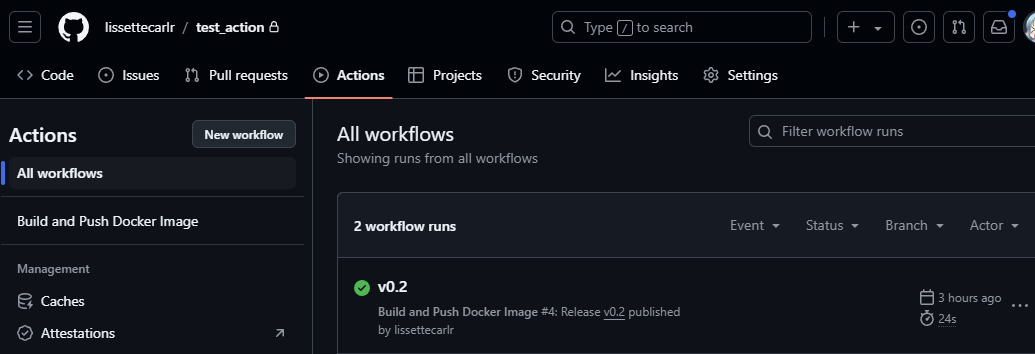
之后每次在页面中创建Releases,发布一个新版本后,就触发actions,可以通过页面顶部标签点进去查看结果。例如发布名称为v0.2

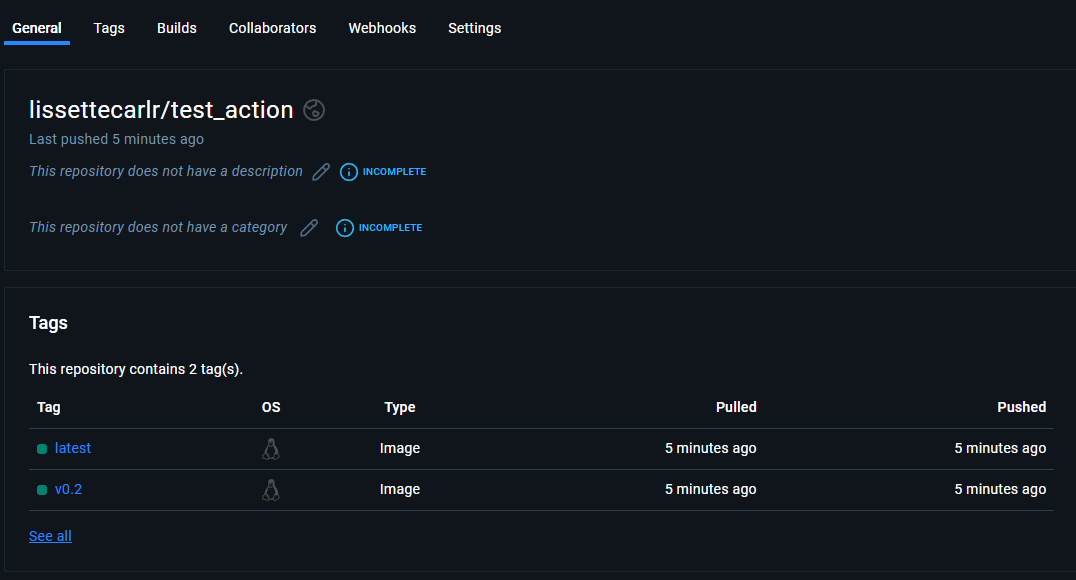
当流程执行完成后,在docker hub上便能看见推送过来的镜像

hexo编译推送到其他分支
我用来编译博客的配置
1
2
3
4
5
6
7
8
9
10
11
12
13
14
15
16
17
18
19
20
21
22
23
24
25
26
27
28
29
30
31
32
33
34
35
36
37
38
39
40
41
| name: Deploy Hexo Blog
on:
push:
branches:
- blog
jobs:
build-deploy:
runs-on: ubuntu-latest
steps:
- name: Checkout repository
uses: actions/checkout@v3
with:
submodules: true
ref: blog
- name: Set up Node.js
uses: actions/setup-node@v3
with:
node-version: '20'
- name: Install Hexo
run: npm install -g hexo-cli
- name: Install dependencies
run: npm install
- name: Clean and generate static files
run: |
hexo clean
hexo bangumi -u
hexo generate
- name: Deploy to master branch
uses: peaceiris/actions-gh-pages@v3
with:
github_token: ${{ secrets.GITHUB_TOKEN }}
publish_dir: ./public
publish_branch: master
|

