本文最后更新于 2025年4月2日 凌晨
Harbor 是一个开源的可信云原生注册表项目,可用于存储和分发 Docker 镜像。本文将介绍如何在 Ubuntu 系统上安装和配置 Harbor,以及如何使用 Harbor 进行镜像的推送和拉取。
1 环境准备 1.1硬件要求
资源
最低配置
推荐配置
CPU
2 核
4 核
内存
4 GB
8 GB
磁盘
40 GB
160 GB
1.2软件要求
操作系统 :Ubuntu 20.04 或更高版本Docker :20.10.10 以上版本Docker Compose :v1.18.0 以上版本,或 Docker Compose v2(docker-compose-plugin)OpenSSL :默认已安装,可以通过openssl version查看
安装 Docker
更新 apt 包索引
安装必要的依赖
1
2
3
4
5
6
sudo apt install \
拉取GPG密钥
1
2
3
sudo install -m 0755 -d /etc/apt/keyringschmod a+r /etc/apt/keyrings/docker.gpg
添加源
1 echo "deb [arch=amd64 signed-by=/etc/apt/keyrings/docker.gpg] https://mirrors.aliyun.com/docker-ce/linux/ubuntu $(lsb_release -cs) stable" | sudo tee /etc/apt/sources.list.d/docker.list > /dev/null
更新 apt 包索引并安装 Docker
1
2
sudo apt update
查看安装版本
1
2
3
4
docker -v
1.3端口 harbor 要求目标主机开放以下端口,如果使用反代,后面是可以通过配置修改这些端口号的。
端口
协议
描述
443
HTTPS
Harbor门户和核心API在此端口接受HTTPS请求。可以在配置文件中更改此端口。
4443
HTTPS
Harbor的Docker内容信任服务连接。可以在配置文件中更改此端口。
80
HTTP
Harbor门户和核心API在此端口接受HTTP请求。可以在配置文件中更改此端口。
2 安装Harbor 2.1下载 Harbor 从 Harbor 发布页下载离线安装包:harbor-offline-installer-v2.12.2.tgz。由于文件较大,建议先下载到本地,再上传至服务器。
1
2
3
wget https://github.com/goharbor/harbor/releases/download/v2.12.2/harbor-offline-installer-v2.12.2.tgz
2.2修改配置文件 在软件目录下
1
2
cp harbor.yml.tmpl harbor.yml
我这里直接使用Harbor的nginx,并且使用https,所以需求进行下列修改:
* hostname: reg.mydomain.com改成要使用的域名
* certificate: /root/https/mydomain.pem
* private_key: /root/https/mydomain.key
如果要用外面的nginx做反代,则需要修改
2.3安装 在 Harbor 目录下执行:
安装日志示例:
1
2
3
4
5
6
7
8
9
10
11
12
13
[Step 5]: starting Harbor ...
安装完成后,通过域名访问。默认用户名和密码是 admin 和 Harbor12345。
3 使用 3.1用户管理 在 系统管理 -> 用户管理 界面创建用户。用户分为管理员和普通用户,默认创建为普通用户。
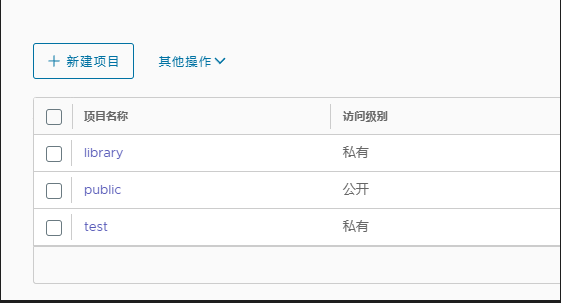
3.2项目管理 项目分为 私有 和 公开。公开项目允许所有用户读取,私有项目仅限特定用户访问。可以在项目的成员列表中设置访问权限。
3.3推送镜像 首先需要登录:
1
2
3
4
5
6
7
8
9
docker login <Harbor服务器地址>test in /root/.docker/config.json.
然后给想推送的镜像打TAG,标签格式:
1 <Harbor服务器地址>/<项目名称>/<镜像名称>:<标签>
实际命令示例:
1 docker tag python:3.10-sli harbor.mycompany.com/library/python:3.10-slim
如果是自编则就直接加上地址:
1 docker build -t harbor.mycompany.com/library/python:3.10-slim .
推送:
1
2
3
4
5
6
7
docker push harbor.mycompany.com/library/python:3.10-slim 46b43d63df64: Pushed f82a34d9ac9e: Pushed 228f3372b10a: Pushed 8b296f486960: Pushed 3.10-slim: digest: sha256:65461331c9562d3ec474b541ede343be22d616923493ef54c953a30a477b343a size: 1159
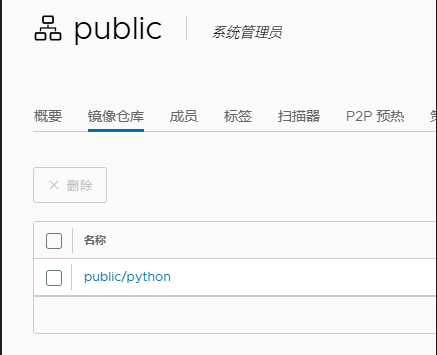
直接在web页面中,public项目里的镜像仓库页面便能看到刚上传的镜像了
3.4拉取镜像 仍然需要先登录
1
2
docker login <Harbor服务器地址>
然后拉取
1
2
3
4
5
6
7
8
9
10
11
docker pull <Harbor服务器地址>/<项目名称>/<镜像名称>:<标签>for harbor.mycompany.com/public/python:3.10-slim
3.5批量推送脚本 1 2 3 4 5 6 7 8 9 10 11 12 13 14 15 16 17 18 19 20 21 22 23 24 25 26 27 28 29 30 31 32 33 34 35 36 37 38 39 40 41 42 43 44 45 46 47 48 49 50 51 52 53 54 55 56 57 58 59 60 61 "" " 使用说明 1. 登录harbor sudo docker login harbor.mycompany.com chmod +x push_images.py python test.py " "" "openjdk:21-ea-17-slim-buster" ,"hyperf/hyperf:8.1-alpine-v3.15-swoole" ,"hyperf/hyperf:8.1-alpine-v3.16-swoole-v5" ,"yandex/clickhouse-server:latest" ,"elasticsearch:8.9.0" ,"kibana:8.9.0" ,"mysql:latest" ,"node:18.20.1-alpine3.19" ,"node:18.20.5-alpine3.21" ,"node:14.20.1-alpine3.16" ,"elasticsearch:8.14.3" ,"kibana:8.14.3" ,"mongo:5.0.5" ,"emqx:5.1.3" ,"influxdb:2.0.9" ,"mongo:5.0.23" ,"xuxueli/xxl-job-admin:2.4.0" "harbor.mycompany.com/public/" for image in images:"{registry_prefix}{image}" print (f"正在拉取镜像 {image}..." )"sudo" , "docker" , "pull" , image], check=True)print (f"正在为镜像 {image} 打标签为 {new_image}..." )"sudo" , "docker" , "tag" , image, new_image], check=True)print (f"正在推送镜像 {new_image}..." )"sudo" , "docker" , "push" , new_image], check=True)print (f"处理镜像 {image} 时发生错误:{e}" )continue print ("所有镜像已完成拉取、标签和推送。" )
3.6 转存脚本 拉取dockerhub的镜像,转存到harbor中
1
2
3
4
5
6
7
8
9
10
11
12
13
14
15
16
17
18
19
20
21
22
23
24
25
26
27
28
29
30
31
32
33
34
35
36
37
38
39
40
41
42
43
44
45
46
47
#!/bin/bash if [ $# -eq 0 ]; then echo "使用方法: $0 <image_name>" echo "例如: $0 golang:1.21.1-alpine3.18" exit 1fi "harbor.yourhost.com" "root" "xxxxx" echo "正在登录Harbor..." echo "$PASSWORD " | sudo docker login "$HARBOR_URL " -u "$USERNAME " --password-stdinif [ $? -ne 0 ]; then echo "登录失败,请检查凭据" exit 1fi "$1 " "harbor.yourhost.com/public/" "${REGISTRY_PREFIX} ${IMAGE} " echo "正在拉取镜像 ${IMAGE} ..." if ! sudo docker pull "${IMAGE} " ; then echo "拉取镜像 ${IMAGE} 失败" exit 1fi echo "正在为镜像 ${IMAGE} 打标签为 ${NEW_IMAGE} ..." if ! sudo docker tag "${IMAGE} " "${NEW_IMAGE} " ; then echo "打标签失败" exit 1fi echo "正在推送镜像 ${NEW_IMAGE} ..." if ! sudo docker push "${NEW_IMAGE} " ; then echo "推送失败" exit 1fi echo "镜像处理完成"
使用:./push_images.sh golang:1.21.1-alpine3.18
4 相关链接