本文最后更新于 2026年4月17日 早上
点击按钮发送PUT请求的一个示例
创建
首先下载微信开发者工具,然后左上角点击项目,新建项目,如下图。点击注册,会进入web页面,根据提示完成注册,进入小程序管理平台
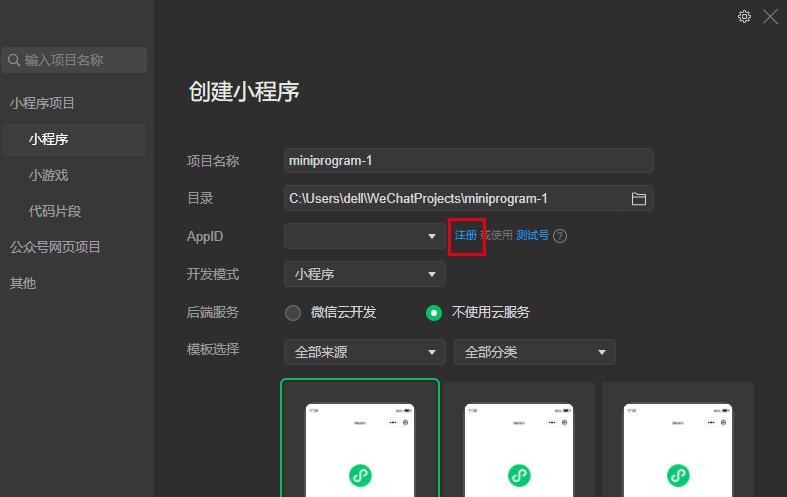
在开发设置子栏目中,得到AppID(小程序ID),切换回微信开发者工具,输入。后端服务选择不使用云服务,不然项目里会有一堆示例页面。模板选择javaScript,确定即可
编程
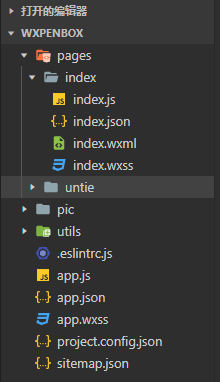
生成后项目目录大致如下:
修改app.wxss
这就是全局的样式,这里写一个button,那么所有页面都可以使用这个样式。
1
2
3
4
5
6
7
8
9
10
11
12
13
14
15
16
17
18
19
| .button1 {
width: 80%;
margin-top: 50rpx;
background-color: rgb(36, 222, 255);
color: white;
border-radius: 98rpx;
display: flex;
flex-direction: row;
align-items: center;
justify-content: center;
}
.hover-class-1 {
top: 3rpx;
background-color: #4cc1f0;
}
|
修改/pages/index.wxml
项目中每个页面都以在pages文件夹中一个单独文件夹存放,分别有个4个文件,分别是wxml、wxs、js、json。其中的wxml是页面布局,wxs是样式,js是页面逻辑,json是页面数据。
这里面可能有示例代码,全部删掉,
1
2
3
4
5
6
|
<view class="container">
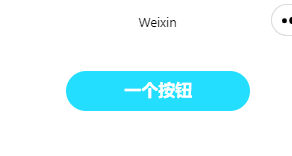
<button class='button1' hover-class="hover-class-1" bindtap="buttonCallback">一个按钮</button>
</view>
|
配合全局按钮的样式,实际效果如下:
修改/pages/index.js
同样先删掉Page({})中的示例代码,建立全局变量,填入需要发送的消息和发送目标地址
1
2
3
4
| data: {
msg:'测试消息',
serverUrl:'http://192.168.2.137:10002/'
},
|
这里注意的是,本地通过右上方点击详情->本地设置,勾选不校验域名,这样就可以发送IP端口服务器了,但是也只能用于测试,发布时候的连接必须是https。
需要在小程序管理平台中,服务器域名子栏目添加request合法域名,这样才能发送成功。
接下来是按钮的事件,buttonCallback(),使用wx.request进行发送
1
2
3
4
5
6
7
8
9
10
11
12
13
14
15
16
17
18
19
20
21
22
23
24
25
26
27
28
29
30
31
32
33
34
35
36
37
38
39
40
| buttonCallback()
{
const that = this
console.log(that.data.serverUrl)
wx.request({
url : that.data.serverUrl,
header: {
'content-type': 'application/json'
},
method:"PUT",
data:that.data.msg,
success (res) {
console.log("--------------------------")
console.log(res.data)
if(res.data)
{
wx.showToast({
title: '发送成功',
icon: 'success',
duration: 2000
})
}
else
{
wx.showModal({
title: "失败!",
content: res.data.error.message,
showCancel: false,
})
}
},
fail(){
wx.showToast({
title: '服务器无响应',
icon: 'error',
duration: 2000
})
}
})
},
|
可以在本地用python弄个server来测试
1
2
3
4
5
6
7
8
9
10
11
12
13
14
15
16
| from flask import Flask, request
app = Flask(__name__)
@app.route("/", methods=["POST", "GET","PUT"])
def hello():
print(f'headers: {request.headers}')
print(f'data: {request.data}')
return "hello world"
if __name__ == "__main__":
app.run(
host="0.0.0.0",
port= 10002
)
|
在点击按钮后server能看到接收
1
2
| data: b'\xe6\xb5\x8b\xe8\xaf\x95\xe6\xb6\x88\xe6\x81\xaf'
192.168.2.137 - - [21/Apr/2022 14:11:12] "PUT / HTTP/1.1" 200 -
|
在微信开发者工具也有打印
1
2
3
| http://192.168.2.137:10002/
--------------------------
index.js? [sm]:25 hello world
|
其他
扫码
直接将按钮事件指向scanCode即可,其中codeMsg保存二维码的信息,codeType保存二维码的类型
1
2
3
4
5
6
7
8
9
10
11
| scanCode() {
const that = this
wx.scanCode({
success(res) {
that.setData({
codeMsg: res.result,
codeType:res.scanType
})
},
})
},
|
输入框
布局
1
| <input placeholder-class="placeholder-style" bindinput="inputMsg" value="{{msg}}"/>
|
JS
1
2
3
4
5
6
| inputMsg(e) {
this.setData({
msg: e.detail.value
})
console.log(this.data.msg)
},
|
添加底部分页
例如下图这样的
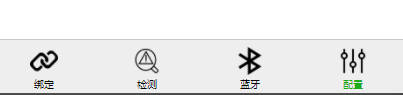
主要在app.json中修改,pages参数添加需要显示的页面位置
1
2
3
4
| "pages": [
"pages/index/index",
"pages/untie/untie"
],
|
然后添加底部菜单的配置
1
2
3
4
5
6
7
8
9
10
11
12
13
14
15
16
17
18
| "tabBar": {
"backgroundColor": "#eeeeee",
"position": "bottom",
"list": [
{
"pagePath": "pages/index/index",
"text": "绑定",
"iconPath": "pic/check.png",
"selectedIconPath": "pic/check.png"
},
{
"pagePath": "pages/untie/untie",
"text": "解绑",
"iconPath": "pic/untie.png",
"selectedIconPath": "pic/untie.png"
}
]
},
|